Google Apps created for Social Login now need to be verified by Google. Verification is required if your app is marked as Public. Before your consent screen and application are verified by Google, you can still test your application with some limitations. Once the limitation is exceeded, users will receive a notification from Google that the App is not verified and probably isn’t trustworthy.
So, before proceeding, please have a look at the Unverified apps documentation, which indicates how unverified apps may behave. If you would like to know more information about the verification itself, please check the OAuth Application Verification FAQ of Google.
Enable login in WordPress
1. App creation
To be able to log in via Google, you must create a Google app first.
- Navigate to https://console.developers.google.com/apis/
- Log in with your Google credentials if you are not logged in.
- If you don’t have a project yet, you’ll need to create one. You can do this by clicking on the “Select a project” button (if you already have a project, then in the top bar click on the name of your project instead). This will bring up a modal, then click “NEW PROJECT“.
- Name your project and then click on the “Create” button again!
- Once you have a project, you may see a window where you can click “SELECT PROJECT“. If this is not the case, click on “Select a project” button again in the top bar, and select the newly made project. (If earlier you have already had a Project, then make sure you select the created project in the top bar!)
- Next, open the navigation menu (click on the burger icon, or press “.” on your keyboard) and go to “APIs & Services” -> “OAuth consent screen“.
- Click on the blue “Get started” button.
- Enter a name for your App to the “App name” field, which will appear as the name of the app asking for consent.
- For the “User support email” field, select an email address that users can use to contact you with questions about their consent.
- Click on “Next“, and for the “Audience” choose a “User Type” according to your needs and press “Next” again. If you want to enable the social login with Google for any users with a Google account, then pick the “External” option!
- Note: We don’t use sensitive or restricted scopes either. But if you will use this App for other purposes too, then you may need to go through an Independent security review!
- For the “Contact Information” enter an email address (you can set more than one) Google can use to notify you about changes to the project, and click “Next” once more.
- Agree to the “Google API Services: User Data Policy“, and click “Continue“.
- You can review the information entered, and if all looks correct, click on the blue “Create” button.
- Next, select the “Branding” option from the left menu.
- You can update the “App name” and “User support email” here if needed.
- (Optional) Select an “App logo“.
- Note: After you upload a logo, you will need to submit your app for verification unless the app is configured for internal use only or has a publishing status of “Testing”.
- Next, provide the appropriate links to the “Application home page“, “Application privacy policy link” and “Application terms of service link” fields.
- Under the “Authorized domains” section press the “Add Domain” button and enter your domain name, without subdomains! E.g.: example.com
You can find a suggestion for this, at the backend of Nextend Social Login. - Once you are done, click on the “Save” button.
- Next, select the “Clients” option from the left menu, then click “Create client“.
- Choose “Web application” as the “Application type“, and enter a name.
- Under the “Authorised redirect URIs” section click “Add URI” and add the URL that Nextend Social Login suggests at the backend!
- Click on the “Create” button.
- A modal should pop up with your credentials. If that doesn’t happen, go to the “Clients” in the left hand menu and select your app by clicking on its name and you’ll be able to copy-paste the “Client ID” and “Client Secret” from there.
- Currently your App is in “Testing” mode, so only limited number of people can use it. To allow this App for any user with a Google Account, click on the “Audience” option on the left side, then click the “Publish app” button under the “Publishing status” section, and press the “Confirm” button.
2. App setup
Once your Google app is ready, you’ll need to copy and paste the Client ID and Client Secret to the Google provider’s Settings tab. You can find the information at your Google app’s Settings, which you can reach from the left sidebar.
3. Verification
Once your Client ID and Client Secret have been added, you need to verify the setup first. This verification helps you identify possible problems with the app.
Settings
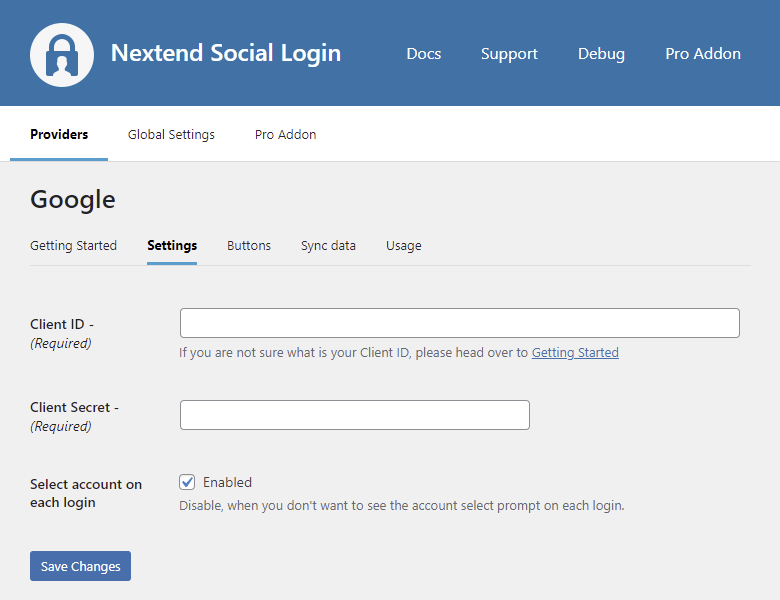
- Client ID: The Client ID of your Google app. You can find it in the left menu: Credentials → select your App.
- Client Secret: The Client Secret of your Google app. You can find it in the left menu: Credentials → select your App.
- Select account on each login: When enabled, Google will display the account select prompt each time the user logs in with the Google provider.
Other settings
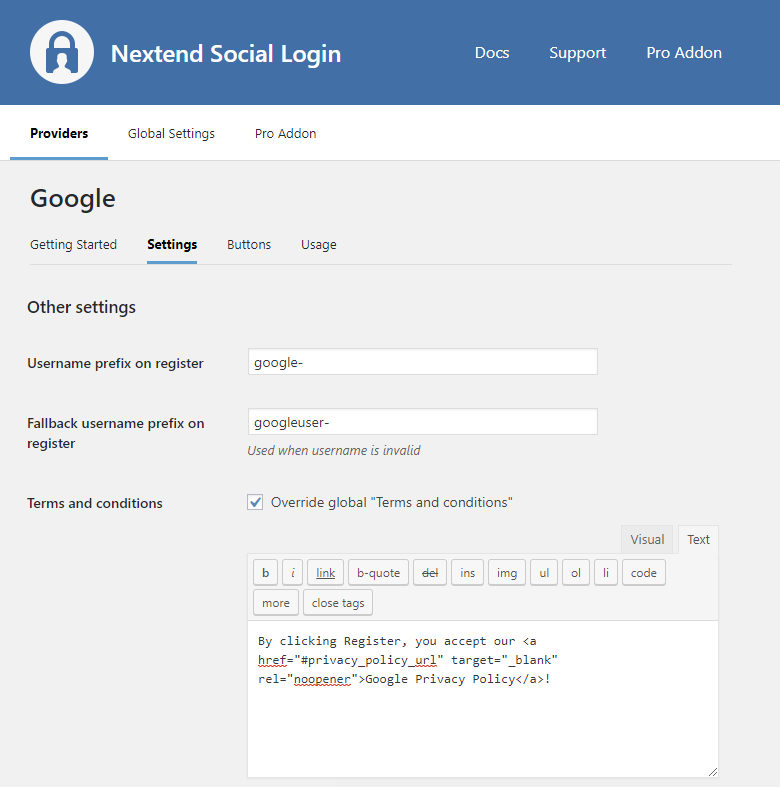
Username prefix on Register
Whenever a new user registers with their Google account, they can get a custom prefix so you can easily identify them.
Fallback username prefix on register
Whenever a new user registers with their Google account and we can not generate a valid username from the first name or last name, a random username will be generated. With this option, they can get a custom prefix so you can easily identify them.
Terms and conditions
This option can only be seen if Terms and Conditions is set to Show in the Global Settings → Privacy tab. Here, you can set custom Terms and Conditions for users who register with Google. For more information, please read our Privacy documentation.
Sync data
By default, Nextend Social Login stores the first name, last name, email, avatar url and access token if it is possible, however, some additional information can also be retrieved and stored.
When an option is checked, that field will be stored in a meta key with the specified name.

- Sync fields: These determine when the synchronization shall happen. Whenever a user registers, logs in, or links an existing WordPress account with a provider, their data will be retrieved and stored.
- Locale: Stores the user’s locale. Returns string.
- Genders*: Stores the user’s genders. Returns string.
- Biographies*: Stores the user’s introduction. Information is set on the Google – About Me page. Returns string.
- Birthdays*: Stores the user’s birthday. Returns a string in the format: YYYY-MM-DD.
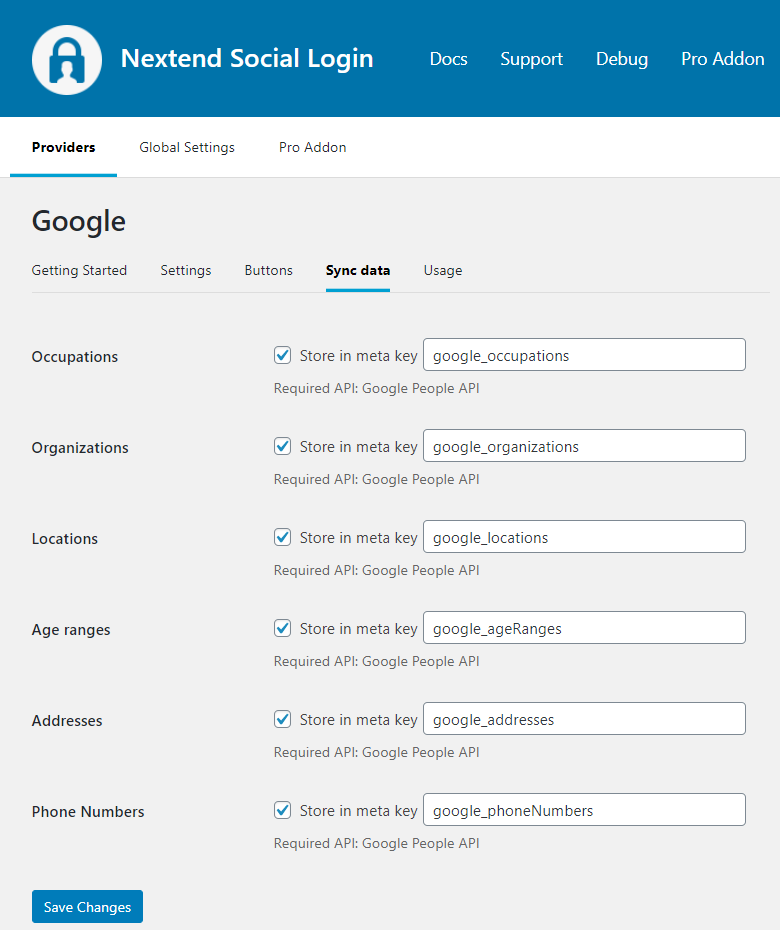
- Occupations*: Stores the user’s occupation. Information is set on the Google – About Me page. Returns string.
- Organizations*: Stores the user’s organization information from Google – About Me( Stored values: name, title, type, start date, end date, is it current). Returns array.
- Locations*: Stores the place where the user lives or where the user used to live. Information is set on the Google – About Me page. Returns array.
- Age ranges*: Stores the user’s age range. Returns string.
- Addresses*: Stores the addresses of the user. Information is set on the Google – About Me page. Returns array.
- Phone Numbers*: Stores the user’s phone numbers. Information is set on the Google – About Me page. Returns array.
- Navigate to Google API Console
- Select your existing Google APP on the top left corner with the “Select a project” option if you have not selected it yet.
- Type “Google People API” in the search field and click on the one called “Google People API”!
- By pressing the “Enable” button, your App is done!
Nextend Social Login Pro Addon 3.0.14 and earlier used to depend on the Google+ API, which was announced to shut down on March 7, 2019. This is the reason Nextend Social Login – Pro Addon uses the Google People API starting with version 3.0.15.
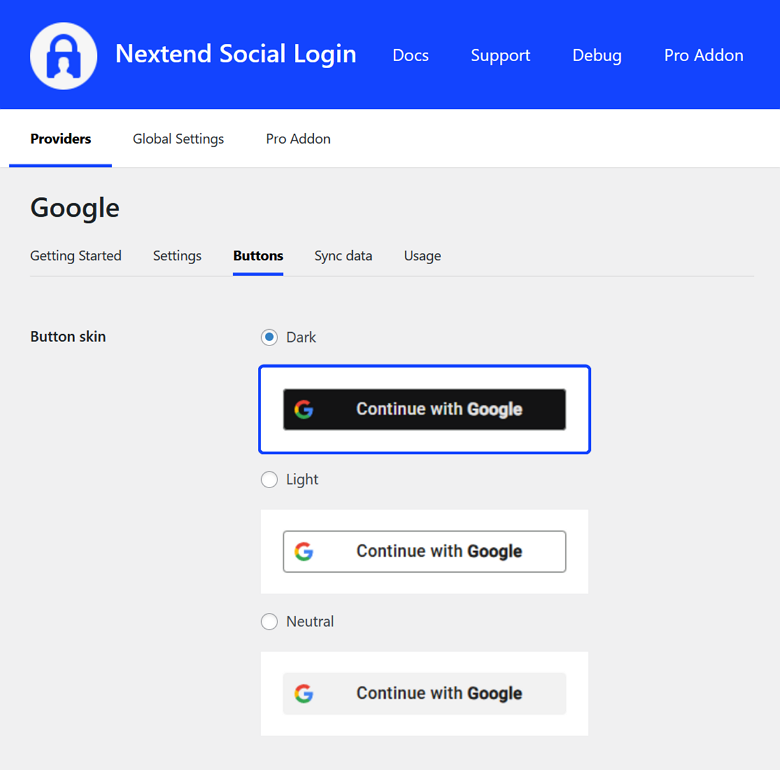
Branding Guidelines
According to the Google Sign-In Branding Guidelines, the button needs to comply with some requirements. At the buttons tab of the Google provider, there are predefined skins (light and dark), which comply with those requirements.
OAuth redirect URL changes
If the OAuth endpoint of the provider changes for any reason, such as:
- you change the URL of /wp-login.php
- you set up the OAuth redirect URI proxy page setting
- or the website URL itself changes ( e.g.: domain change )
then you must whitelist the new OAuth endpoint in the app you configured for Nextend Social Login. Below you can find a guide that helps you update it to the new one:
- Navigate to https://console.developers.google.com/apis/
- Log in with your Google credentials if you are not logged in
- In the top menu, on the left side, select the project that your Google App is associated with.
- Click on the “Credentials” in the left hand menu
- Under the “OAuth 2.0 Client IDs” section choose the “Client ID” that Nextend Social Login mentions at the backend.
- Under its “Authorised redirect URIs” section click “Add URI” and add the URL that Nextend Social Login suggests at the backend!
- Click on “Save“
Common error messages
redirect_uri_mismatch
The redirect URI in the request, https://yoursite.com/wp-login.php?loginSocial=google (where the yoursite.com is your domain), does not match the ones authorized for the OAuth client.
Access blocked: This app’s request is invalid
You can’t sign in because this app sent an invalid request. You can try again later or contact the developer about this issue. Learn more about this error
If you are a developer of this app, see the error details.
Error 400: redirect_uri_mismatch
The problem is that the entered Authorized redirect URIs field is not correct for your app. Check the 22th step of the App setup to fix the problem.
invalid_client
Error: invalid_client The OAuth client was not found.
The entered Client ID is not correct. Maybe the app with the entered ID was deleted. Go to the Google provider → Settings and make sure that an existing App’s Client ID and Client Secret was entered.
Request is missing required authentication credential
Error: Request is missing required authentication credentials. Expected OAuth 2 access token, login cookie, or another valid authentication credential. See https://developers.google.com/identity/sign-in/web/devconsole-project.
The entered Client ID or Client Secret is not correct, it probably contains some extra white-space characters. Make sure you copied the Client ID and the Client Secret in the appropriate format.
Error 403: org_internal
This client is restricted to users within its organization.
The “User Type” in your App was set to “Internal”. The problem is that the internal Apps can only be used by the members of the organization. If the goal is to make the app usable by everybody, the “External” User Type must be selected, as we suggested in the 10th step of the Getting Started Section.
Other 403 and 404 errors
When your other providers work properly, but your Google provider gives you a 403 or 404 error, your server or firewall will most likely have a limitation that prevents access to pages with HTTP/HTTPS links in them. For more information, please visit our Google 403 & 404 errors documentation.
FAQ
Why am I not logged in automatically after the version 3.0.19?
For a better user experience, we modified our Google authentication-related codes. So once the user was already logged in with the Google provider and logged out, then the person will have the opportunity to choose a different Google account.
It was a common problem that users logged in with a Google account other than the one they wanted, so they logged out from the site. But from this point, the login happened automatically with the selected account.
Fortunately, Google offers an account selector scope, so starting from Nextend Social Login 3.0.19, the account selection box will be offered instead of the auto login. In this way, users will be able to choose the account they would like to log in with.