Enable login in WordPress
You must apply for a Developer Account and be approved before you may create new apps. Once approved, you will be able to create new apps from developer.twitter.com.
App creation – v1.1 API version
Additionally, the query string is no longer supported in the Callback URL, meaning that in the URL you must leave the ? and every other parameters which come after it.
To be able to log in via X you must create an X app first.
- Navigate here.
- Log in with your X credentials if you are not logged in.
- If you don’t have a developer account yet, please apply one by filling all the required details! This is required for the next steps!
- Once your developer account is complete, navigate back to https://developer.twitter.com/en/portal/projects-and-apps if you aren’t already there!
- Click on “+ Add Project”!
- Name your project, and go through the basic setup. You’ll need to select your use case, give a description then click the “Next” button.
- Choose the “Production” option for “App environment”, then press “Next”!
- Into the “App name” field, enter a name for your App, then press “Next” again!
- You’ll find your API key and secret on this page. Copy and paste the “API Key” and the “API Key Secret” to the corresponding fields at Nextend Social Login > X > Settings and press “Save Changes”.
- Go back to your X project and on the left side, under the “Projects & Apps” section click on the name of your App.
- Scroll down and click on the “Set up” button at “User authentication settings”.
- Choose the “Read” option at “App permission”.
- If you want to get the email address as well, then don’t forget to enable the “Request email from users” option. In this case you also need to fill the “Terms of service” and the “Privacy policy” fields with the corresponding URLs!
- Select the “Web App, Automated App or Bot” option for “Type of App”.
- Into the “Callback URI / Redirect URL” field you should add the URL that Nextend Social Login suggests at the backend.
- Enter your site’s URL to the “Website URL” field.
You can find a suggestion for this, at the backend of Nextend Social Login. - Click on “Save”.
- Go back to Nextend Social Login then verify and enable the X provider!
App creation- v2 API version
Twitter V2 API has some rate limits that you need to consider before you choose a plan. For example we use the “GET /2/users/me” endpoint, which have:
- User Rate Limit: which means a user can me “X” requests every 24 hours.
- Effective 30-day limit: which means your App can serve a total of “Y” requests every 30 days. This limit is shared between all users and applied to the entire project.
Once the rate limit is reached, people won’t be able to login with X until the limit resets. If you want to have a higher limit, you might need to upgrade to the Basic plan of Twitter API
To be able to log in via X you must create an X app first.
- Navigate here.
- Log in with your X credentials if you are not logged in.
- If you don’t have a developer account yet, please apply one by filling all the required details! This is required for the next steps!
- Once your developer account is complete, navigate back to https://developer.twitter.com/en/portal/projects-and-apps if you aren’t already there!
- Name your project, and go through the basic setup. You’ll need to select your use case, give a description then click the “Next” button.
- Choose the “Production” option for “App environment”, then press “Next”!
- Into the “App name” field, enter a name for your App, then press “Next” again!
- Click on the the App settings button on the bottom right corner.
- Scroll down and click on the “Set up” button at “User authentication settings”.
- Choose the “Read” option at “App permission”.
- Select the “Web App, Automated App or Bot” option for “Type of App”.
- Into the “Callback URI / Redirect URL” field you should add the URL that Nextend Social Login suggests at the backend.
- Enter your site’s URL to the “Website URL” field.
You can find a suggestion for this, at the backend of Nextend Social Login. - Click on “Save”.
- Find your “Client ID” and “Client Secret”. Copy and paste the credentials to the corresponding fields at “Nextend Social Login > X > Settings” and press “Save Changes”.
- Verify the settings and enable the X provider!
Required Nextend Social Login settings for X App
Once your X app is ready you’ll need to copy and paste the API Key and API Key Secret or the Client ID and Client Secret ( depending on the selected API version ) to the X provider’s Settings tab.
Verify the settings
Once your API Key and API Key Secret or the Client ID and Client Secret ( depending on the selected API version ) have been added you need to verify the setup first. This verification helps you identify possible problems with the app.
Settings
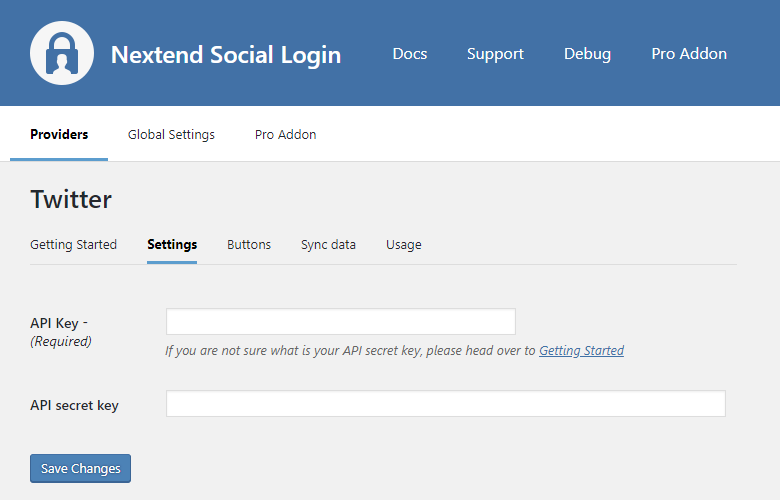
- API version: The OAuth and API version that Nextend Social Login should use. Either v1.1 or v2
- API Key ( v1.1 ): The API Key of your X app. You can find it at your App → Keys and Tokens tab → Consumer Keys section.
- API Key Secret ( v1.1 ): The API Key Secret of your X app. You can find it at your App → Keys and Tokens tab → Consumer Keys section.
- Client ID ( v2 ): The Client ID of your X app. You can find it at your App → Keys and Tokens tab → OAuth 2.0 Client ID and Client Secret section.
- Client Secret ( v2 ): The Client Secret of your X app. You can find it at your App → Keys and Tokens tab → OAuth 2.0 Client ID and Client Secret section.
Other settings
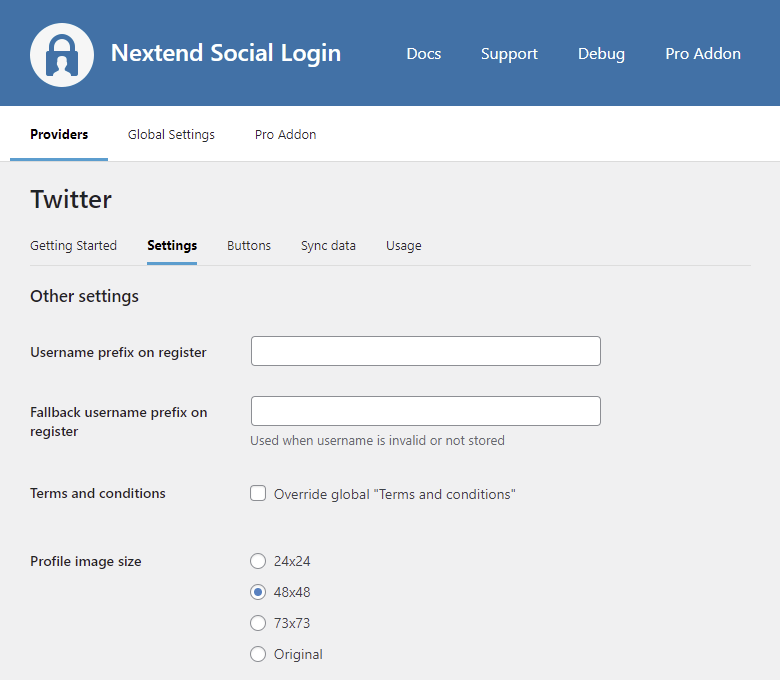
Username prefix on Register
Whenever a new user registers with their X account they can get a custom prefix so you can easily identify them.
Fallback username prefix on register
Whenever a new user registers with their X account and we can not generate a valid username from the first name or last name, a random username will be generated. With this option they can get a custom prefix so you can easily identify them.
Terms and conditions
This option can only be seen, if Terms and conditions is set to Show in Global Settings → Privacy tab. Here you can set custom Terms and Conditions for users who register with X. For more information please read our Privacy documentation.
Profile image size
The avatar will be stored with the selected size.
Sync data
By default Nextend Social Login stores the first name, last name, email, avatar url and access token if it is possible, however some additional information can also be retrieved and stored.
When an option is checked, that field will be stored in a meta key with the specified name.
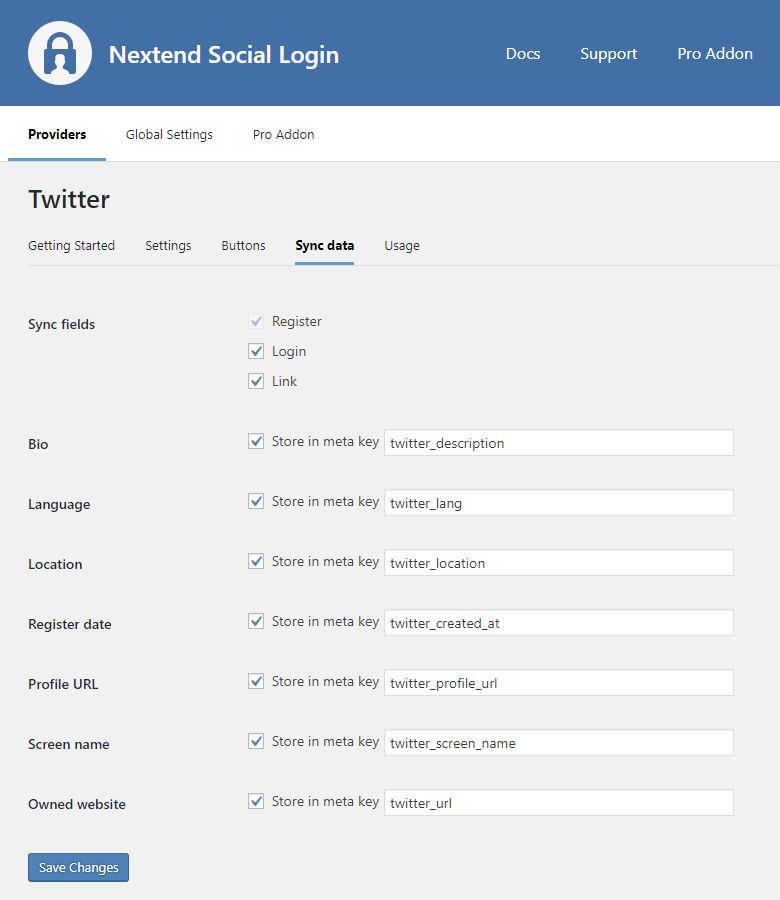
- Sync fields: It determines when the synchronization shall happen. Whenever a user registers, logs in, or links an existing WordPress account with a provider, their data will be retrieved and stored.
- Bio: Stores the user’s bio.
- Language: Stores the user’s language.
- Location: Stores the user’s location.
- Register date: Stores the date, when the X account registration happened.
- Profile URL: Stores the user’s X profile URL.
- Screen name: Stores the user’s screen name without the @ tag.
- Owned website: Stores the user’s website.
OAuth redirect URL changes
If the OAuth endpoint of the provider changes for any reason, such as:
- you change the URL of /wp-login.php
- you set up the OAuth redirect URI proxy page setting
- or the website URL itself changes ( e.g.: domain change )
then you must whitelist the new OAuth endpoint in the app you configured for Nextend Social Login. Below you can find a guide that helps you update it to the new one:
- Navigate to https://developer.twitter.com/en/portal/projects-and-apps
- Log in with your X credentials if you are not logged in
- On the left side, under the “Projects & Apps” section click on the name of your App.
Make sure you are editing the correct App, by comparing ClientID ( v2 ) / API Key ( v1.1 ) values that you can find on the “Keys and tokens” tab of your App, to the value that Nextend Social Login mentions at the backend. - Click on the “Edit” button at “User authentication settings“.
- Into the “Callback URI / Redirect URL” field you should add the URL that Nextend Social Login suggests at the backend.
- Make sure the “Website URL” field also contains the “Website URL” value that Nextend Social Login suggests at the backend.
- Click on “Save“
Common error messages
Callback url has been locked
- Error: Unexpected response: This client application’s callback url has been locked /oauth/request_token
The problem is that the value that was entered into the “Callback URI / Redirect URL” field is not correct for your app. Check the 15th step of the App setup to fix the problem.
oauth_callback value ‘oob’
- Error: Unexpected response: Desktop applications only support the oauth_callback value ‘oob’ /oauth/request_token
The problem is that the value that was entered into the “Callback URI / Redirect URL” field is not correct for your app. Check the 15th step of the App setup to fix the problem.
Not a valid callback URL format
- Error: The client application failed validation: Not a valid callback URL format.
The problem is that the value that was entered into the “Callback URI / Redirect URL” field is not correct for your app or it may contain whitespace character. Check the 15th step of the App setup to fix the problem.
Could not authenticate you
- Error: Could not authenticate you
The entered API Key is not correct. Maybe the app with the entered ID was deleted. Go to the X provider → Settings and make sure that an existing App’s API Key and API Key Secret was entered.
FAQ
How can I get the email address from the X users when using the v1.1 API version?
If your app is already set up, go to the Projects & Apps Overview page, find your App and click on the App settings icon ( the one that looks like a gear). Then click on the “Edit” button at the “Authentication settings” section and switch on the “Request email address from users” setting.
If you ask the email address, you also need to fill the “Terms of service” and the “Privacy policy” fields with the corresponding URLs of your site!
How can I get the email address from the X users when using the v2 API version?
Currently it is not possible to get the user’s email address when using the v2 API version, as X doesn’t offer a scope that requests access to this resources, and by default the email address is not returned, unfortunately.